Creating Containers with Docker
Last updated on 2025-06-24 | Edit this page
Estimated time: 80 minutes
Overview
Questions
- How do you create new Docker images?
Objectives
- Explain how a Dockerfile is used to create Docker images
- Create a Dockerfile to run a command
- Use
docker buildto create a new image - Update a Dockerfile to run a Python script
Introduction
In the previous episode, we used a Docker image to run a Docker container. We briefly covered how images are used to make a container, but where does the Docker image come from? In this episode, we will create and use Dockerfiles to make a new image, and use that image to start a Docker container.
Dockerfiles
A Dockerfile is a plain text file that includes instructions for making a Docker image. Dockerfiles can be very short or very long, depending on how complicated the Docker image is going to be. A minimal Dockerfile would have two pieces of information:
- The base image to start from, and
- What to do when the container starts running
The first point (the base image) may seem a little odd, as it appears we are actually building an image from…another image? And that is exactly what we are doing!
It is possible for you to start from an operating system image (e.g. from an ISO file), but there are a lot of Docker images already available for whichever operating system you want to use. But let us not make even more work for ourselves. It’s turtles all the way down and that’s OK.
Dockerfile gross anatomy
The general structure of a Dockerfile is a series of keywords followed by some information. For the minimal Dockerfile we are going to build, we need to include commands to accomplish the two points we mentioned above (identify the base image and do something when the container starts):
- The
FROMcommand is followed by the name of the image to start from and the version number of that image. When we use the Dockerfile to build the Docker image, our computer will start by downloading a copy of that base image, and adding to based on whatever subsequent commands we provide in the Dockerfile. - The
CMDcommand tells the container what to do when it starts running. In some cases, it will start an application, like we saw with the OpenRefine image in the previous episode. TheCMDcommand can also do things like run analyses based on data passed to the container.
For this episode, we will start by creating a Dockerfile with only these two commands:
FROM python:3.9
CMD ["python", "--version"]
Creating Dockerfiles
As mentioned above, Dockerfile are plain text files, so we need to use a text editor to create them. In the virtual machine where we are working, the nano text editor will work for us. To create the Dockerfile, start by opening up the command line terminal again (or opening a new tab if the terminal is already running) and running the following:
nano DockerfileThis command will do two things: first, it creates an empty text file
called “Dockerfile” and, second, it opens the file in the nano text
editor. We will add those two lines, as well as a comment for each line.
Comments are useful for anyone who will need to look at the Dockerfile
in the future (this usually means you!). The comment character,
#, tells the computer to ignore any text that comes to the
right of the #, as it is for human eyes only. Note for
Dockerfiles, the # must come at the start of the
line; otherwise the pound sign (and anything to the right of it)
will be interpeted as code to run. These comments are not necessary to
build the image, but they are a very good practice to get into.
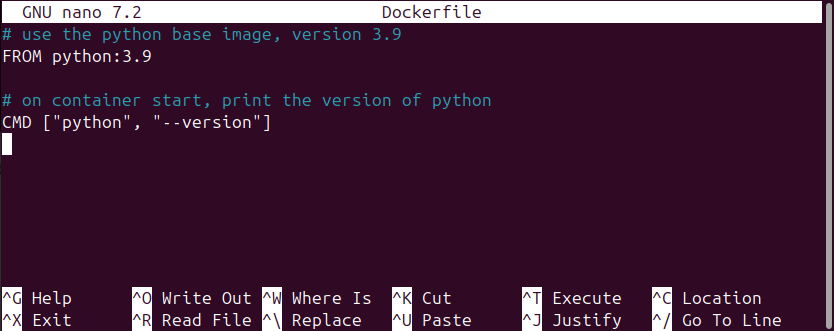
In the nano text editor, add the following:
# use the python base image, version 3.9
FROM python:3.9

# on container start, print the version of python
CMD ["python", "--version"]
Which should look something like this in your terminal:
Once you have that typed in, you can save and close the file. To do
this, first hold down the Control/Command key and press the letter “O”
key (this is often written as ^O) and press “Enter” to
confirm the save to the file called “Dockerfile”. Second, to exit the
nano editor, hold down the Control/Command key and press the letter “X”
key (^X). If you are curious about what was saved to the
Dockerfile, you can run the command cat Dockerfile on the
terminal command line and it will print the contents of the file to the
screen.
Creating images from Dockerfiles
We have now created the Dockerfile, and there is one last step
necessary to make the Docker image from that Dockerfile. To make the
Docker image, we use the docker build command and provide
it with the name of the image. In the terminal command line, run the
following command:
docker build -t vboxuser/python-test .Breaking down the command into the component parts:
-
docker buildis the base command telling our computer to build a Docker image -
-tindicates we are going to “tag” this image with a label -
vboxuser/python-testprovides the name of the repository (vboxuser) and the name of the image (python-test). This convention, using the repository name and the image name, is like using a person’s full name (family name and given name), rather than just someone’s given name. Just using an image name alone, without a repository name, would be like referring to “Mohamed” or “Maria” and expecting other people to know exactly who you are referring to. -
.is just a dot telling your computer where the Dockerfile is located. In the command line interface, the dot is directory where you are running the command. If the Dockerfile was somewhere other than the folder your command line terminal is currently running in, you would replace the dot with that location. For example, if the Dockerfile was located on the Desktop, we would update our command todocker build -t vboxuser/python-text ~/Desktop(where the dot.is replaced with~/Desktop). If you want to find out more about the command line interface, be sure to check out Library Carpentry’s Introduction to the UNIX Shell Lesson.
If you are doing these steps on your local machine, rather than on a
Virtual Machine, you would replace the name of the repository
(vboxuser) with your username for the machine you are
using.
When you run the docker build command, it will create a
new image for use on the machine. The command will likely produce quite
a bit of output to the command line terminal as it works, and it should
end with a couple of lines that look like:
 => => writing image sha256:48e8a6dc6b14b79b26ec6e5c7a5f3c48989b7f57a819262d2c26023c645cc9a6                                         0.0s
 => => naming to docker.io/vboxuser/python-test                                                                                      0.0s
(note the values after sha256 will be different on your
machine.)
You can see all the images you have available for use by running the following in the command line terminal:
docker image lsWhich should produce the following output:
REPOSITORY                 TAG       IMAGE ID       CREATED         SIZE
vboxuser/python-test       latest    48e8a6dc6b14   2 minutes ago   999MB
easypi/openrefine          latest    3ee6bb3d8cfa   3 years ago     243MB
Note we see the image for OpenRefine that we downloaded in the previous episode, along with the new image we just created, python-test.
Challenge 1: Updating our analogy
In the previous episode, a couple of different analogies were introduced to explain the relationship between a Docker image and a Docker container. Pick one of those analogies and update it to also include the Dockerfile.
- To use an analogy from architecture, Dockerfiles are a file with blueprints, images are the rendered or printed blueprints, and containers are the actual building.
- An image is a recipe, say, for your favorite curry, while the container is the actual curry dish you can eat. In this analogy, a Dockerfile might just be a list of ingredients and the general concept of a curry. Granted, some of these analogies can only go so far.
- “Think of a container as a shipping container for software - it holds important content like files and programs so that an application can be delivered efficiently from producer to consumer. An image is more like a read-only manifest or schematic of what will be inside the container.” (from Jacob Schmitt). In this case, the Dockerfile could be a template that one uses to create the manifest or schematic.
- If you are familiar with object-oriented programming, you can think of a Dockerfile as an abstract superclass, an image as a class, and a container an object of that class.
Starting containers
Now that we have built the image, we want to use it! We are going to
use the same commands to start a container as we did in the previous
episode. We start by using the image to run a container with the
docker run command, passing also the name of the image to
use. Run the following into the command line terminal:
docker run vboxuser/python-testMake sure the last part (vboxuser/python-test) matches
the same repository/ image combination you used when you ran the
docker build command.
You may notice something missing from the last time we ran
docker run. Recall that to start the OpenRefine container,
we ran:
docker run -p 3333:3333 easypi/openrefineThis time, we omitted the information about ports (the
-p 3333:3333 part) because the python-test image does not
need a way to exchange information between the container and the
computer that is running the container (in this case, the Virtual
Machine).
Our container is not designed to do a lot - it should only start up,
run the command to print the version of Python that is installed on the
container, and then stop the container. After issuing the
docker run command, we should see
Python 3.9.21in the command line terminal (it is possible the exact version of Python may be different on your machine, e.g. 3.9.23).
We can now check the status of our images with the
docker ps command. Since we want to list both running
containers and stopped containers, we need to also use the “all” option
(by adding -a to our command). Run the following in the
terminal command line:
docker ps -aAnd the two containers we ran so far will be displayed in the output table:
CONTAINER ID   IMAGE                      COMMAND                  CREATED              STATUS                          PORTS     NAMES
fa10d154754d   jcoliver/python-test       "python --version"       About a minute ago   Exited (0) About a minute ago             charming_meitner
3ece25d51a80   easypi/openrefine          "/app/refine -i 0.0.…"   5 minutes ago        Exited (129) 5 minutes ago                kind_ardinghelli
Challenge 2: Update base image
- Update the Dockerfile to have a base image that includes Python version 3.12 (instead of Python version 3.9)
- Build the image
- Start the container to confirm it is using Python version 3.12
To change the base image, update the information passed to the
FROM command. That is, open the Dockerfile and change this
line:
FROM python:3.9
to
FROM python:3.12
Remember to open the file in a text editor, you can type the following in the terminal command line:
nano DockerfileTo save your changes, hold down the control key and press the letter “O” key (^O). To exit the nano text editor, use ^X (Control-X).
Copying files into the image
The example above does not do much - it prints the version of python installed on the container and then stops the container. We usually want our containers to do more than this! For example, we may want to use the container to run an analysis based on a script we have on our machine. In this case, we would start by creating an image that copied that script from our computer into the image and executing that script when the container is run. We can do all of this by first creating that script on the machine that will build the image (the Virtual Machine in this case) and then updating the Dockerfile.
Write a python script
Start by opening the nano text editor through the command line
terminal with the command nano intro.py. This creates a
blank python script called “intro.py” and opens the nano software for us
to edit the file. In that file, we are going to just add one line, to
print something when the container runs. I am going to go with the
classic “hello world”:
print("Hello World!")Save this file with Ctrl-O and exit the nano program with Ctrl-X.
Update the Dockerfile
As mentioned above, we now need to update our Dockerfile to (1) copy
that script to the image and (2) run the script when the container
starts. Once again, you can edit the Dockerfile with the nano software
by typing nano Dockerfile into the command line terminal.
For the first part (copying), we will use the COPY command
in the Dockerfile.
On the line right below the FROM command, add the copy
instructions:
# use the python base image, version 3.12
FROM python:3.12

# Copy the intro.py script onto the image
COPY intro.py .

# on container start, print the version of python
CMD ["python", "--version"]
The COPY command needs two pieces of information:
-
intro.pythis is the name of the script to copy -
.the dot tells Docker to copy the script to the home directory on the image and to use the same name for the file (“intro.py”)
We also need to update the Dockerfile so the script actually runs! To
do this, we change our CMD command so that instead of
asking for the version of python, it will run the script we copied to
the image. Update the CMD line so instead of “–version”, it
has the name of the script in quotation marks:
# use the python base image, version 3.12
FROM python:3.12

# Copy the intro.py script onto the image
COPY intro.py .

# on container start, use python to run the python script "intro.py"
CMD ["python", "intro.py"]
Finally, save and exit the nano editor with Ctrl-O and Ctrl-X, respectively.
Build and run the new image
And one more time we will build and run our image. Using commands that we saw previously, on the terminal command line, first run
docker build -t vboxuser/python-testto create a new version of the image. Next run
docker run vboxuser/python-testto run the container. When you run the container this time, it should not print the version of python, but rather the message “Hello World!”
Challenge 3: One more container
For the last exercise, update your the Dockerfile to use Python version 3.13 and change the message to something other than “Hello World!” (you can have it print your name or today’s date). Once the Dockerfile is updated, build the image, and run the container to ensure your changes were updated.
- Open the Dockerfile in a text editor (we have been using nano, so
you can run, in the command line terminal,
nano Dockerfileto open the file for editing). - Change the
FROMline to readFROM python:3.13 - Save the file (Ctrl-O in nano) and exit the text editor (Ctrl-X).
Update the Python script with a new message
- Open the script titled “intro.py” in a text editor (we have been
using nano, so you can run, in the command line terminal,
nano intro.pyto open the file for editing). - Change the message in the
printcommand to something else. If you want to print a specific date, you could update the print command toprint("Today's date is December 16, 2024"). - Save the file (Ctrl-O in nano) and exit the text editor (Ctrl-X).
Build and run the new image
- Build the image with the same
docker buildcommand we used previously:
docker build -t vboxuser/python-test- Start the container with the
docker runcommand:
docker run vboxuser/python-testto run the image. Now instead of “Hello World!”, the container should print your updated message.
- Dockerfiles include instructions for creating a Docker image
- The
FROMcommand in a Dockerfile indicates the base image to build on - The
CMDcommand in a Dockerfile includes commands to execute when a container starts running - The
COPYcommand in a Dockerfile copies files from your local machine to the Docker image so they are available for use when the container is running