Virtual machines using VirtualBox
Last updated on 2025-09-26 | Edit this page
Estimated time: 18 minutes
Overview
Questions
- How do you import and launch a VM using VirtualBox?
- How do you accomplish common tasks?
- How and why do you change settings for a VM?
Objectives
- Explain how to navigate the VirtualBox interface
- Demonstrate how to run a VM
- Explore managing resources
- Show how to take advantage of snapshots
Introduction
Let’s now turn to exploring how to use VMs. There are many choices for running VMs, each with their own strengths and weaknesses. The ones you may encounter more often are the VMWare family of products, Hyper-V which is included with Windows, Parallels which is a product for MacOS, and VirtualBox which is owned by Oracle Corporation and is cross-platform and open-source.
As part of the setup, you should have already have VirtualBox installed and running on your system before continuing.
Running the example VM
Learners may be prompted to use the Basic or Expert interface when VirutalBox is run for the first time. Learners should select Basic.
If learners already ran VirtualBox and selected Expert, make sure students know what they see may not be exactly what is on your screen. They can switch back to Basic by going to the File menu, selecting Preferences, and clicking the Basic tab in the top left-hand corner of the dialog.
If there are other issues running the VM on Windows, refer to the setup. There is an instructor note under the Windows section.
First, run VirtualBox. Depending on your operating system and exact system configuration, you may get different popups asking for certain permissions or showing you some notifications. Grant all the permissions it asks for and close any popups (if the popup shows an error, ask the instructor for help). You may also get a question asking whether you want to use the “basic” or “expert” interface (choose basic).
You should see a window that resembles this: 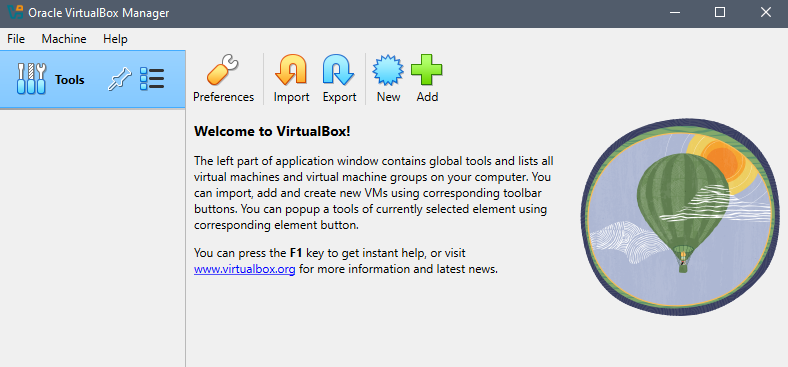
Now, let’s import the VM you downloaded previously
- Extract the Zip file you downloaded into a folder somewhere on your system.
- In VirtualBox, click the big green ‘+ Add’ button
- In the popup, locate the extracted folder and open the .vbox file (on Windows, this file has a blue icon).
- After doing so, a new entry will appear in VirtualBox underneath the Tools row in the left-hand sidebar.
Start the VM
- Select the imported VM if it isn’t selected already
- Click the green “-> Start” button
- Accept any additional dialogs that pop up (if any)
- A new window will appear that shows some commands being run,
followed by a graphical desktop. If prompted for a login, enter
vboxuserandchangeme.
If students get an error opening VirtualBox or importing the VM, there may be something you can do (reinstalling, rebooting, checking there is enough disk space, making sure they are not trying to import directly from inside the Zip).
If they have an error trying to run the VM, there is less you can do. Some things to try would be tinkering with the VM settings under the System or Display categories
- Making sure they downloaded the right VM for their system
- Reducing the base memory
- Playing with the Paravirtualization Interface choice under the Acceleration tab (expert mode must be selected at the top of the settings for the tab to appear).
- Increasing the video memory
If none of that works, there is nothing else you can do and they will have to pair up with someone that has it working.
Interacting with the VM
Allow learners to play around with the VM as you talk.
- Explain that what they’re seeing is an entire operating system running in the window.
- Mention that this particular OS is Linux (Debian 12 Bookworm if they care)
- Explain that the way they interact with this OS might be different than their main computer
- Point out where the main menu is (top left, called Applications)
- Point out familiar things like the icons on the desktop
- A launcher at the bottom-center of the screen that allows quick access to some apps (e.g., web browser). Note the launcher may be hidden until they mouse over the area.
- Consider opening the file manager app to show/open some files, noting how things might look different than their normal computer
- Explain what a few icons in the launcher do.
Look for and open the web browser in the VM. What do you notice about interacting with stuff inside the VM? How is it different or the same than your normal computer?
Common tasks
Shutting down the VM
To properly turn off the VM, use the functionality built into the guest OS. In our case, go to Applications in the top right corner and look for the log out icon at the bottom of the popup menu. Click it and see the red Shut Down button.
(Don’t actually shut down the system)
Challenge 1:
Another way to turn off the VM is to close the window the VM is running in. On Windows, click the ‘X’ at the top right corner of the VM window. You should see a popup that’s similar to this.
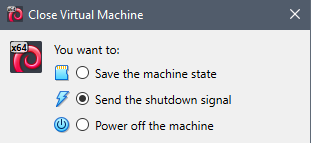
What do you think the difference is between the “Send the shutdown signal” option and the “Power off the machine” option?
The “power off the machine option” is the equivalent of ripping out the power cable from the wall. It will immediately terminate the VM without trying to gracefully allow the guest OS to shut down. This might result in data loss or even render the machine unbootable. “Send the shutdown signal” will try to indicate to the guest OS that it is time to shut down (equivalent clicking Shut Down in the guest OS) . Not all guests can be cleanly shut down this way.
Saving execution states
A very useful feature of VMs is the ability to save snapshots of the current state of the VM at any point. This can be used to
- Turn off the VM and go back to it later with everything still open and running. Equivalent to walking away from your computer and coming back later
- Preserve the state of the OS or an application before doing system updates
- If you’re experimenting, to be able to easily return to a ‘clean’ state
Let’s see snapshots in action.
- In your VM, open up a few windows and applications.
- Click the button to close the VM as shown in Challenge 1.
- Select the “Save the machine state” option.
The VM will close. In VirtualBox, start the VM again. You should see the same windows you opened before.
You can also take more than one snapshot. To do so, go to VirtuaBox, select the VM, and click the Take button. These snapshots act like checkpoints and you can go back to any of them at any time.
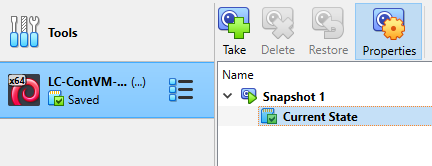
To restore a snapshot, right-click on it and select “Restore”.
Challenge 2:
What if we’re done with a snapshot and don’t want it anymore? Delete the snapshot we created, Snapshot 1. What is the result if you boot up the VM again?
The VM should look exactly the same as before you deleted the snapshot. The difference is that you will no longer be able to go back to the state that was stored in the snapshot.
It is possible to create multiple snapshots. This is useful to be able to return the state of the VM to various points in time. Creating such a chain of snapshots will appear as a set of nested entries in the VirtualBox snapshots pane. A new snapshot can be created from any prior snapshot, thereby creating a complex heirarchical set of snaphots, kind of like a folder structure on a computer. Refer to this explanation from user “gronostaj”:
Let’s start with this situation:
Snapshot A
 |
 +-- Snapshot B  (current)
You can now make some changes create a Snapshot C:
Snapshot A
 |
 +-- Snapshot B
      |
      +-- Snapshot C  (current)
It was created under Snapshot B because B was the active snapshot at the time.
Now you can switch to Snapshot A, make some changes and create a new Snapshot D. It will be created under Snapshot A, because it’s derived from A (A was active):
Snapshot A
 |
 +-- Snapshot B
 |    |
 |    +-- Snapshot C
 |
 +-- Snapshot D  (current)
You can still switch to other snapshots, including other branches of the hierarchy, without losing anything (as long as you don’t have non-snapshotted changes).
It works a bit like folders. When you create a new folder, it will be created under the current folder.
Managing VM Resources
Recall that VMs share the resources of the host OS. These resources can be managed on a per-VM basis.
Right-click the VM and select Settings. You should see a window that
looks like this: 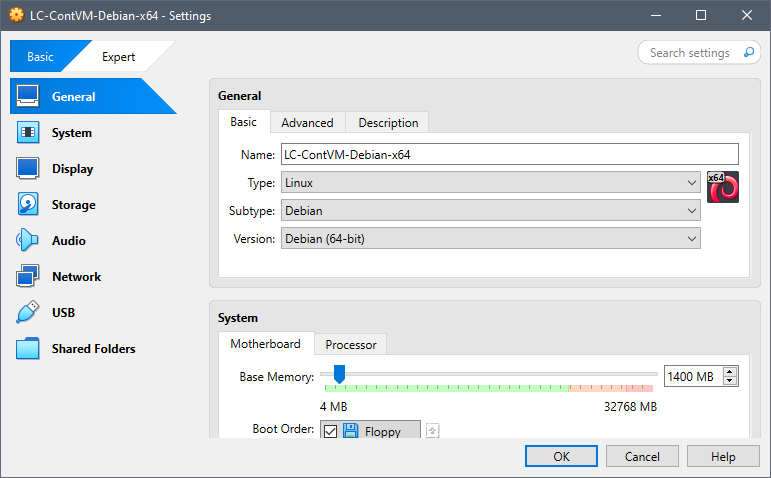
There are various sections that can be modified. Note that changing some of these after a guest OS is installed may break it. However, some are safe to change. The ones that are safe generally correspond to things that can be upgraded in a normal computer (e.g., memory, number of monitors).
Challenge 3:
Refer to the screenshot above. Generally speaking, what should be the effect on the VM’s performance if we increase the amount of base memory?
With the VM turned off, increase the base memory to 2048 MB (= 2 GB, = 2,097,125 kB). Verify the increase by running this command inside a terminal window to show the memory available in kB.
cat /proc/meminfo | grep MemTotalWhat number would you expect to see? If the number wasn’t what you expected, why? (Feel free to do an internet search for the answer).
Performance should increase, especially when applications are loading a lot of data into memory. Web browsers are especially heavy memory users.
You should see a number like
2014504 kB. The exact number may vary. You may expect to see2097152 kBwhich is exactly 2048 MB (2048 x 1024). The command we used actually shows available memory.
- The same VM can be copied and run on different computers
- The execution state of VMs can be saved and restored at any time.
- VM resources (e.g., CPUs, memory) can be changed, even after the VM is created. This allows controlling how much resources the VM can consume.